ASCII table
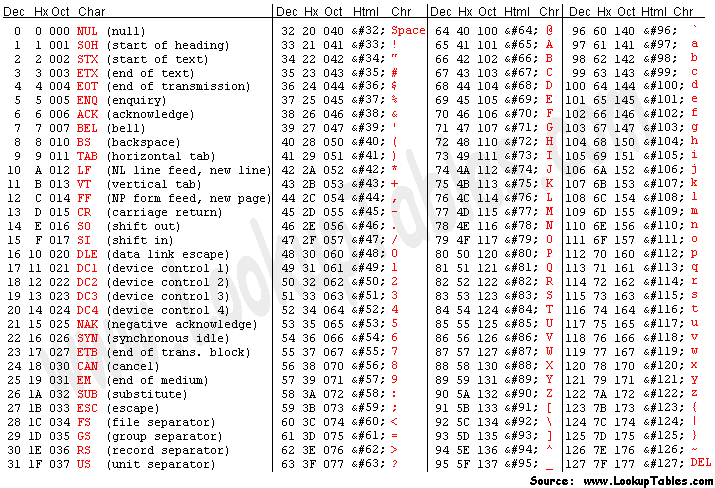 ASCII stands for American Standard Code for Information Interchange. Computers can only understand numbers, so an ASCII code is the numerical representation of a character such as ‘a’ or ’@’ or an action of some sort. ASCII was developed a long time ago and now the non-printing characters are rarely used for their original purpose. Below is the ASCII character table and this includes descriptions of the first 32 non-printing characters. ASCII was actually designed for use with teletypes and so the descriptions are somewhat obscure. If someone says they want your CV however in ASCII format, all this means is they want ‘plain’ text with no formatting such as tabs, bold or underscoring - the raw format that any computer can understand. This is usually so they can easily import the file into their own applications without issues. Notepad.exe creates ASCII text, or in MS Word you can save a file as ‘text only’
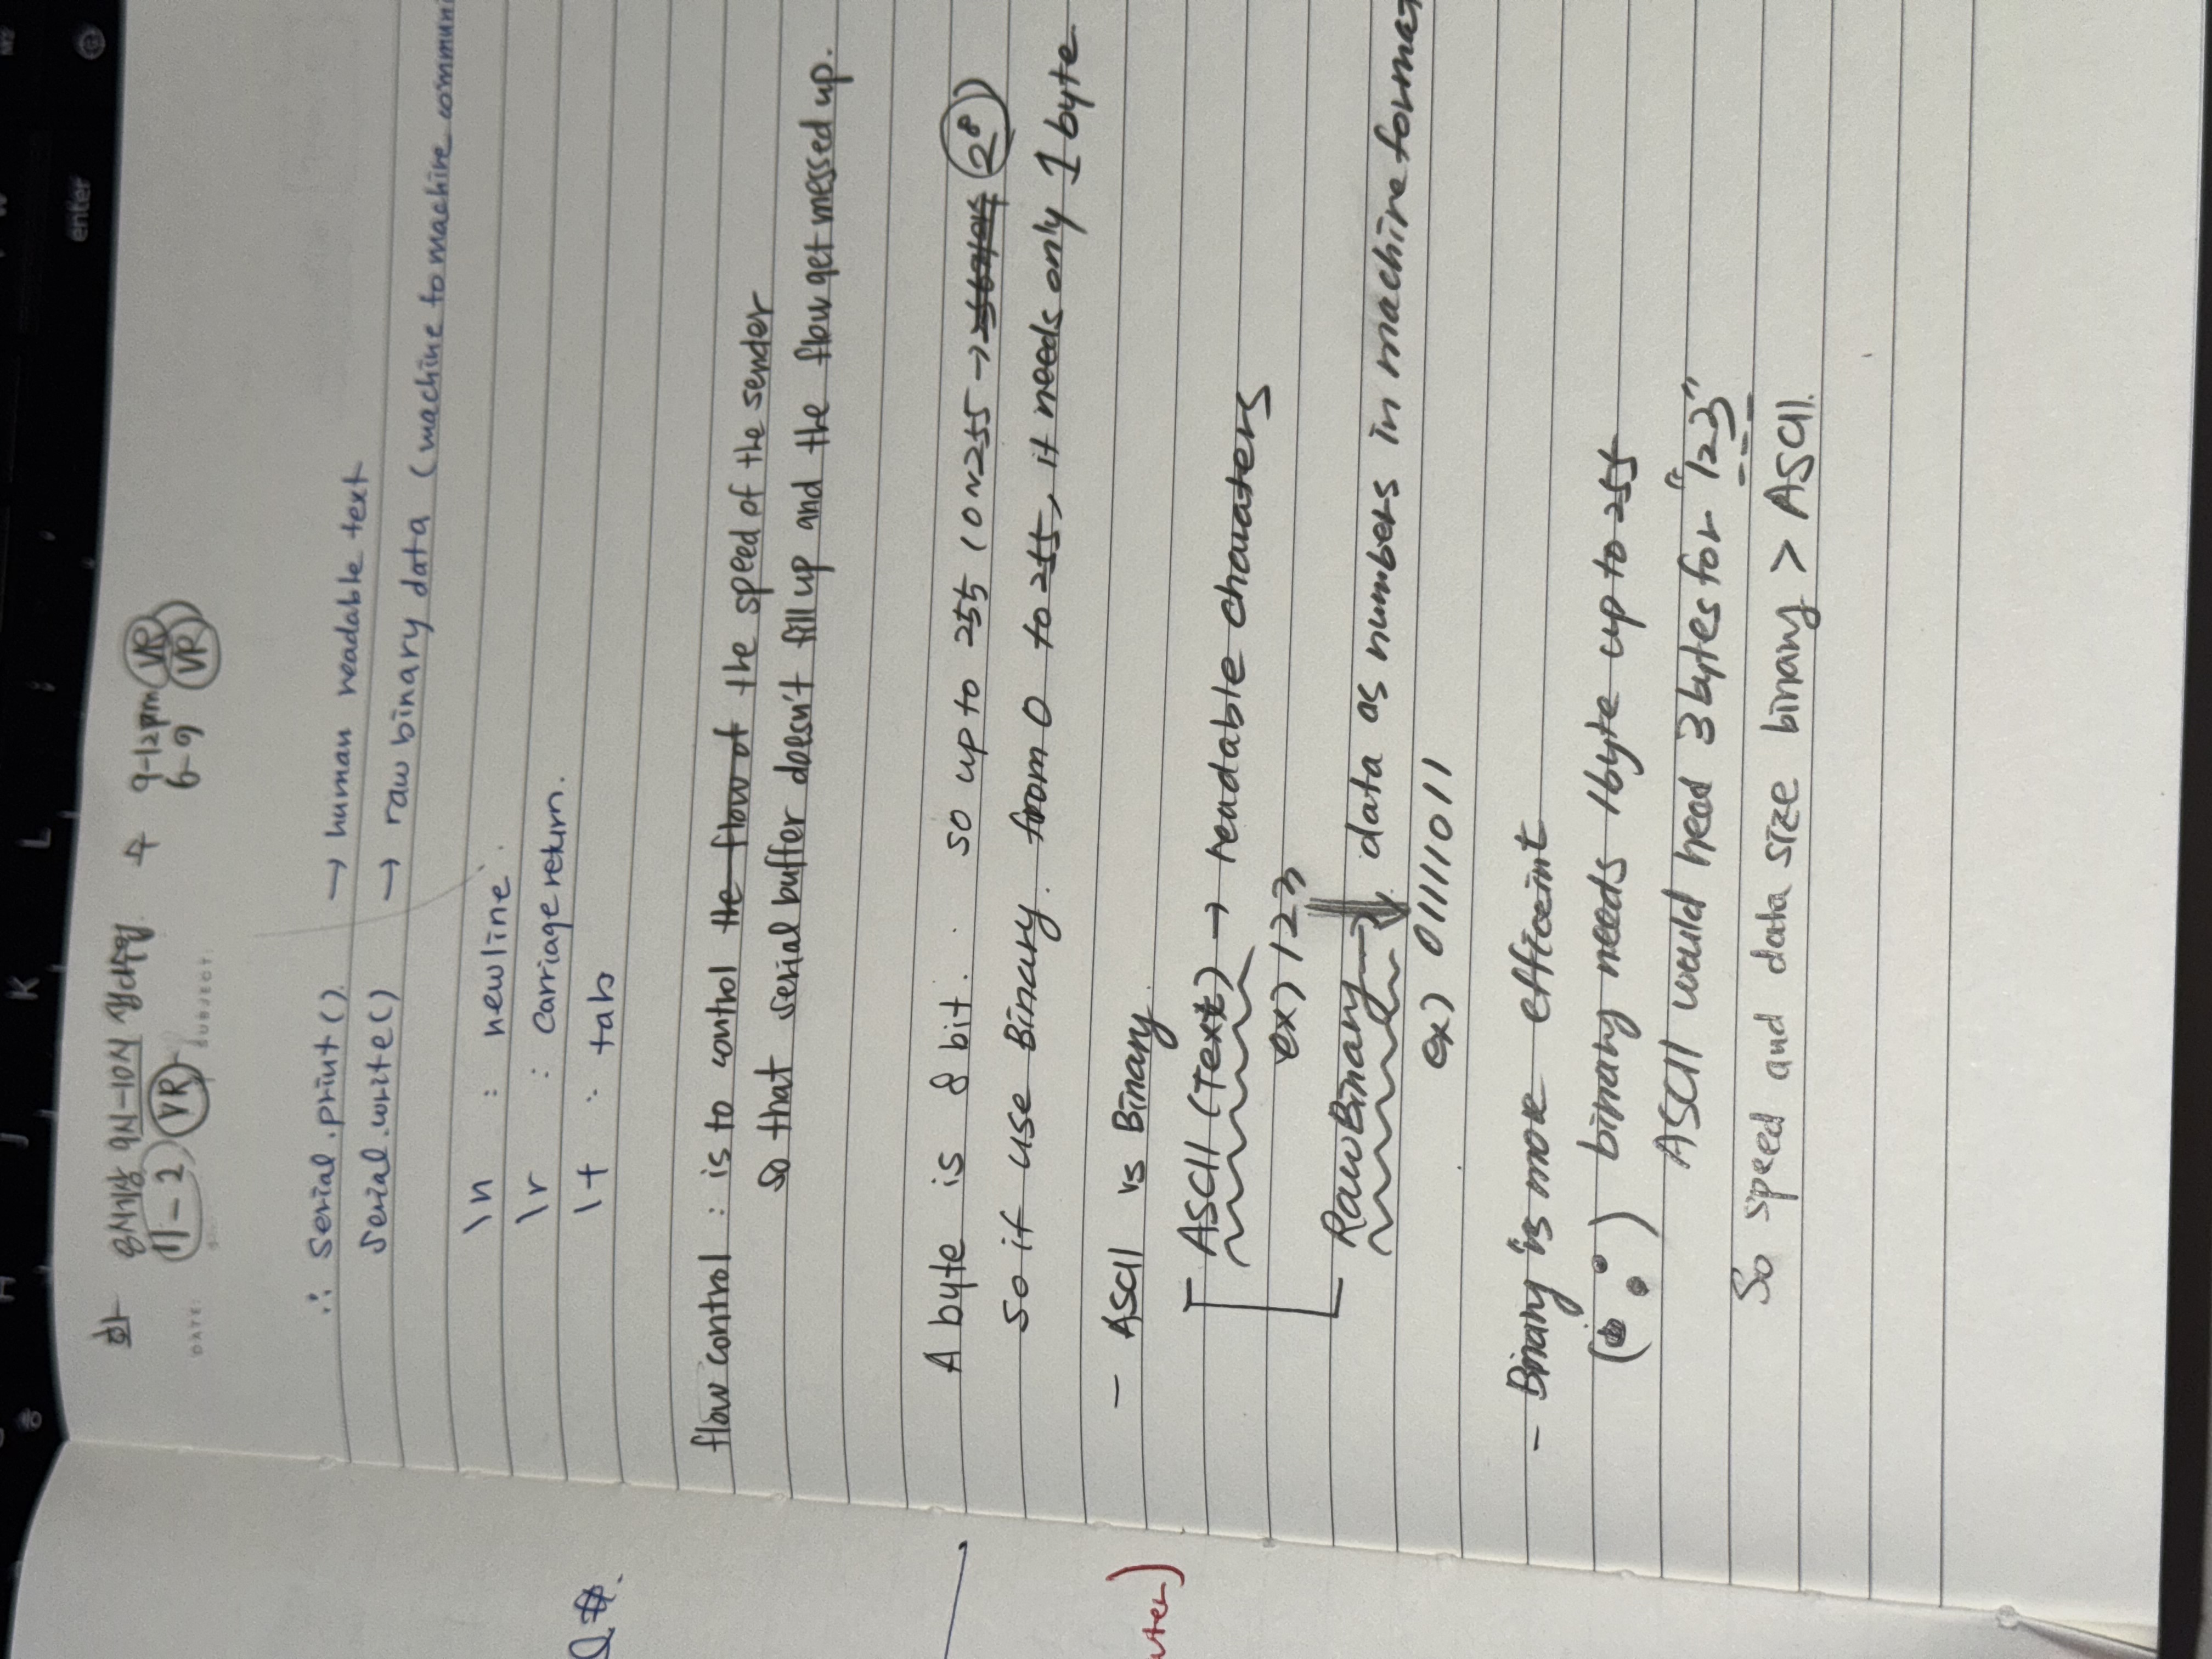
That’s why Serial.print() is human-readable text, but Serial.write() is raw binary data — meant for machine-to-machine communication.
Think of it like this:
-
Serial.write(226) → you’re sending a single LEGO block (raw byte).
-
Serial.print(226) → you’re sending three LEGO blocks shaped as “2”, “2”, and “6” — readable but takes more space.
🔹 When raw binary is useful
You’d use Serial.write() when:
-
Sending sensor data to another microcontroller or computer program that expects binary input.
-
Communicating over a binary protocol (like MIDI, or a custom byte-based format).
You’d use Serial.print() when:
- You want to debug, log, or display readable text in the Serial Monitor.
void setup() {

   // start serial port at 9600 bps:

  Serial.begin(9600);

}

void loop() {

// read analog input, map it to make the range 0-255:

  int analogValue = analogRead(A0);

  int mappedValue = map(analogValue, 0, 1023, 0, 255);

  Serial.println(mappedValue);

// print different formats:

  Serial.write(mappedValue);  // Print the raw binary value

  Serial.print('\t');             // print a tab

// print ASCII-encoded values:

  Serial.print(mappedValue, BIN); // print ASCII-encoded binary value

  Serial.print('\t');             // print a tab

  Serial.print(mappedValue);      // print decimal value

  Serial.print('\t');             // print a tab

  Serial.print(mappedValue, HEX); // print hexadecimal value

  Serial.print('\t');             // print a tab

  Serial.print(mappedValue, OCT); // print octal value

  Serial.println();               // print linefeed and carriage return

}
const int switchPin = 2;
void setup() {
// start serial port at 9600 bps:
Serial.begin(9600);
pinMode(switchPin, INPUT);
}
void loop() {
// read the sensor:
int sensorValue = analogRead(A0);
// print the results:
Serial.print(sensorValue);
Serial.print(",");
// read the sensor:
sensorValue = analogRead(A1);
// print the results:
Serial.print(sensorValue);
Serial.print(",");
// read the sensor:
sensorValue = digitalRead(switchPin);
// print the results:
Serial.println(sensorValue);
}const int switchPin = 2;
int sensorValue ;
void setup() {
Serial.begin(9600);
while (Serial.available() <= 0) {
Serial.println("hello"); // send a starting message
delay(300); // wait 1/3 second
}
}
void loop() {
if (Serial.available()) {
// read the incoming byte:
int inByte = Serial.read();
// read the sensor:
sensorValue = analogRead(A0);
// print the results:
Serial.print(sensorValue);
Serial.print(",");
// read the sensor:
sensorValue = analogRead(A1);
// print the results:
Serial.print(sensorValue);
Serial.print(",");
// read the sensor:
sensorValue = digitalRead(switchPin);
// print the results:
Serial.println(sensorValue);
}
}
Open the serial port
Wait for a Hello
Send a byte to request data
Begin loop:
Wait for one set of data
Send a byte to request new data
end loop
parse data
`function` `serialEvent() {`

  `// read a string from the serial port`

  `// until you get carriage return and newline:`

  `var` `inString = serial.readStringUntil(``"\r\n"``);`

  `//check to see that there's actually a string there:`

  `if` `(inString) {`

    `// split the string on the commas:`

    `var` `sensors = split(inString,` `","``);`

    `if` `(sensors.length > 2) {`

      `// if there are three elements`

      `// element 0 is the locH:`

      `locH = map(sensors[0], 0, 1023, 0, width);`

      `// element 1 is the locV:`

      `locV = map(sensors[1], 0, 1023, 0, height);`

      `// element 2 is the button:`

      `circleColor = 255 - sensors[2] * 255;`

    `}`

  `}`

`}`
**
Lab 2 https://itp.nyu.edu/physcomp/labs/labs-serial-communication/lab-webserial-input-to-p5-js/ I had to change the code to Serial.println(); from Serial.write();
void setup() {

 Serial.begin(9600); // initialize serial communications

}

void loop() {

 // read the input pin:

 int potentiometer = analogRead(A0);

 // remap the pot value to fit in 1 byte:

 int mappedPot = map(potentiometer, 0, 1023, 0, 255);

 // print it out the serial port:

 Serial.println(mappedPot);

 // slight delay to stabilize the ADC:

 delay(1);

}
// variable to hold an instance of the p5.webserial library:

const serial = new p5.WebSerial();


// let options = { baudrate: 9600}; // change the data rate to whatever you wish

// serial.open(portName, options);

// HTML button object:

let portButton;

let inData = 0;                   // for incoming serial data

let outByte = 0;              // for outgoing data

 let xPos = 0;                     // x position of the graph


function setup() {

 createCanvas(400, 300);          // make the canvas

 background(0x08, 0x16, 0x40);

 // check to see if serial is available:

 if (!navigator.serial) {

   alert("WebSerial is not supported in this browser. Try Chrome or MS Edge.");

 }

 // if serial is available, add connect/disconnect listeners:

 navigator.serial.addEventListener("connect", portConnect);

 navigator.serial.addEventListener("disconnect", portDisconnect);

 // check for any ports that are available:

 serial.getPorts();

 // if there's no port chosen, choose one:

 serial.on("noport", makePortButton);

 // open whatever port is available:

 serial.on("portavailable", openPort);

 // handle serial errors:

 serial.on("requesterror", portError);

 // handle any incoming serial data:

 serial.on("data", serialEvent);

 serial.on("close", makePortButton);

}


function draw() {

  graphData(inData);

}


// if there's no port selected,

// make a port select button appear:

function makePortButton() {

 // create and position a port chooser button:

 portButton = createButton("choose port");

 portButton.position(10, 10);

 // give the port button a mousepressed handler:

 portButton.mousePressed(choosePort);

}

// make the port selector window appear:

function choosePort() {

 if (portButton) portButton.show();

 serial.requestPort();

}

// open the selected port, and make the port

// button invisible:

function openPort() {

 // wait for the serial.open promise to return,

 // then call the initiateSerial function

   // Specify the baud rate (must match your Arduino!)

 let options = { baudRate: 9600 };

 serial.open(options).then(initiateSerial);

 // once the port opens, let the user know:

 function initiateSerial() {

   console.log("port open");

 }

 // hide the port button once a port is chosen:

 if (portButton) portButton.hide();

}

// pop up an alert if there's a port error:

function portError(err) {

 alert("Serial port error: " + err);

}

// read any incoming data as a string

// (assumes a newline at the end of it):

function serialEvent() {


 let line = serial.readLine().trim();  // read the whole line


 if (!line) return; // ignore empty lines


 let value = Number(line);  // convert "123" -> 123


 if (!isNaN(value)) {

   inData = value;

   console.log("sensor:", inData);

 }


}


// called when a port connects:

function portConnect() {

 console.log("port connected");

}


// called when a port disconnects:

function portDisconnect() {

 console.log("port disconnected");

 // maybe show the port button again so user can reconnect

 if (portButton) portButton.show();

}


function graphData(newData) {

 // map the range of the input to the window height:

 var yPos = map(newData, 0, 255, 0, height);

 // draw the line in a pretty color:

 stroke(0xA8, 0xD9, 0xA7);

 line(xPos, height, xPos, height - yPos);

 // at the edge of the screen, go back to the beginning:

 if (xPos >= width) {

   xPos = 0;

   // clear the screen by resetting the background:

   background(0x08, 0x16, 0x40);

 } else {

   // increment the horizontal position for the next reading:

   xPos++;

 }

}
Lab 3 https://itp.nyu.edu/physcomp/labs/labs-serial-communication/lab-webserial-output-from-p5-js/
// variable to hold an instance of the p5.webserial library:

const serial = new p5.WebSerial();

// HTML button object:

let portButton;

let inData;                            // for incoming serial data

let outByte = 0;                       // for outgoing data

function setup() {

 createCanvas(400, 300);          // make the canvas

 // check to see if serial is available:

 if (!navigator.serial) {

   alert("WebSerial is not supported in this browser. Try Chrome or MS Edge.");

 }

 // if serial is available, add connect/disconnect listeners:

 navigator.serial.addEventListener("connect", portConnect);

 navigator.serial.addEventListener("disconnect", portDisconnect);

 // check for any ports that are available:

 serial.getPorts();

 // if there's no port chosen, choose one:

 serial.on("noport", makePortButton);

 // open whatever port is available:

 serial.on("portavailable", openPort);

 // handle serial errors:

 serial.on("requesterror", portError);

 // handle any incoming serial data:

 serial.on("data", serialEvent);

 serial.on("close", makePortButton);

}

function draw() {

 // black background, white text:

 background(0);

 fill(255);

 // display the incoming serial data as a string:

 text("incoming value: " + inData, 30, 30);

}


// if there's no port selected,

// make a port select button appear:

function makePortButton() {

 // create and position a port chooser button:

 portButton = createButton("choose port");

 portButton.position(10, 10);

 // give the port button a mousepressed handler:

 portButton.mousePressed(choosePort);

}

// make the port selector window appear:

function choosePort() {

 serial.requestPort();

}

// open the selected port, and make the port

// button invisible:

function openPort() {

 // wait for the serial.open promise to return,

 // then call the initiateSerial function

 serial.open().then(initiateSerial);

 // once the port opens, let the user know:

 function initiateSerial() {

   console.log("port open");

 }

 // hide the port button once a port is chosen:

 if (portButton) portButton.hide();

}

// read any incoming data as a byte:

function serialEvent() {

 // read a byte from the serial port:

 var inByte = serial.read();

 // store it in a global variable:

 inData = inByte;

}

// pop up an alert if there's a port error:

function portError(err) {

 alert("Serial port error: " + err);

}

// try to connect if a new serial port

// gets added (i.e. plugged in via USB):

function portConnect() {

 console.log("port connected");

 serial.getPorts();

}

// if a port is disconnected:

function portDisconnect() {

 serial.close();

 console.log("port disconnected");

}

function closePort() {

 serial.close();

}


function mouseDragged() {

 // map the mouseY to a range from 0 to 255:

 outByte = byte(map(mouseY, 0, height, 0, 255));

 // send it out the serial port:

 serial.write(outByte);

}


function keyPressed() {

 if (key >= 0 && key <= 9) { // if the user presses 0 through 9

   outByte = (key * 25); // map the key to a range from 0 to 225

   serial.write(outByte); // send it out the serial port

 }

}
void setup() {

 Serial.begin(9600);     // initialize serial communications

 pinMode(5, OUTPUT);

}

void loop() {

 if (Serial.available() > 0) { // if there's serial data available

   int inByte = Serial.read();   // read it

   Serial.write(inByte);         // send it back out as raw binary data

   analogWrite(5, inByte);       // use it to set the LED brightness

   // if you're using a speaker instead of an LED, uncomment line below  and comment out the previous line:

   //  tone(5, inByte*10);     // play tone on pin 5

 }

}